Automotive AOSP Emulator
In this repo you can download binary files of avd for Android studio or standalone. I will describe hot to use it.
How to
Let’s start to work.
Before the next step you should already have Android SDK and Android Studio.
Download zip archive
Use this link to download
Unpack zip archive
Unzip archive to “Android SDK path”/system-images/android-30. Result of that is aosp_11 folder into “android-30” folder.

Create avd
I describe method for android studio. You can use different ways.
- Open Android Studio
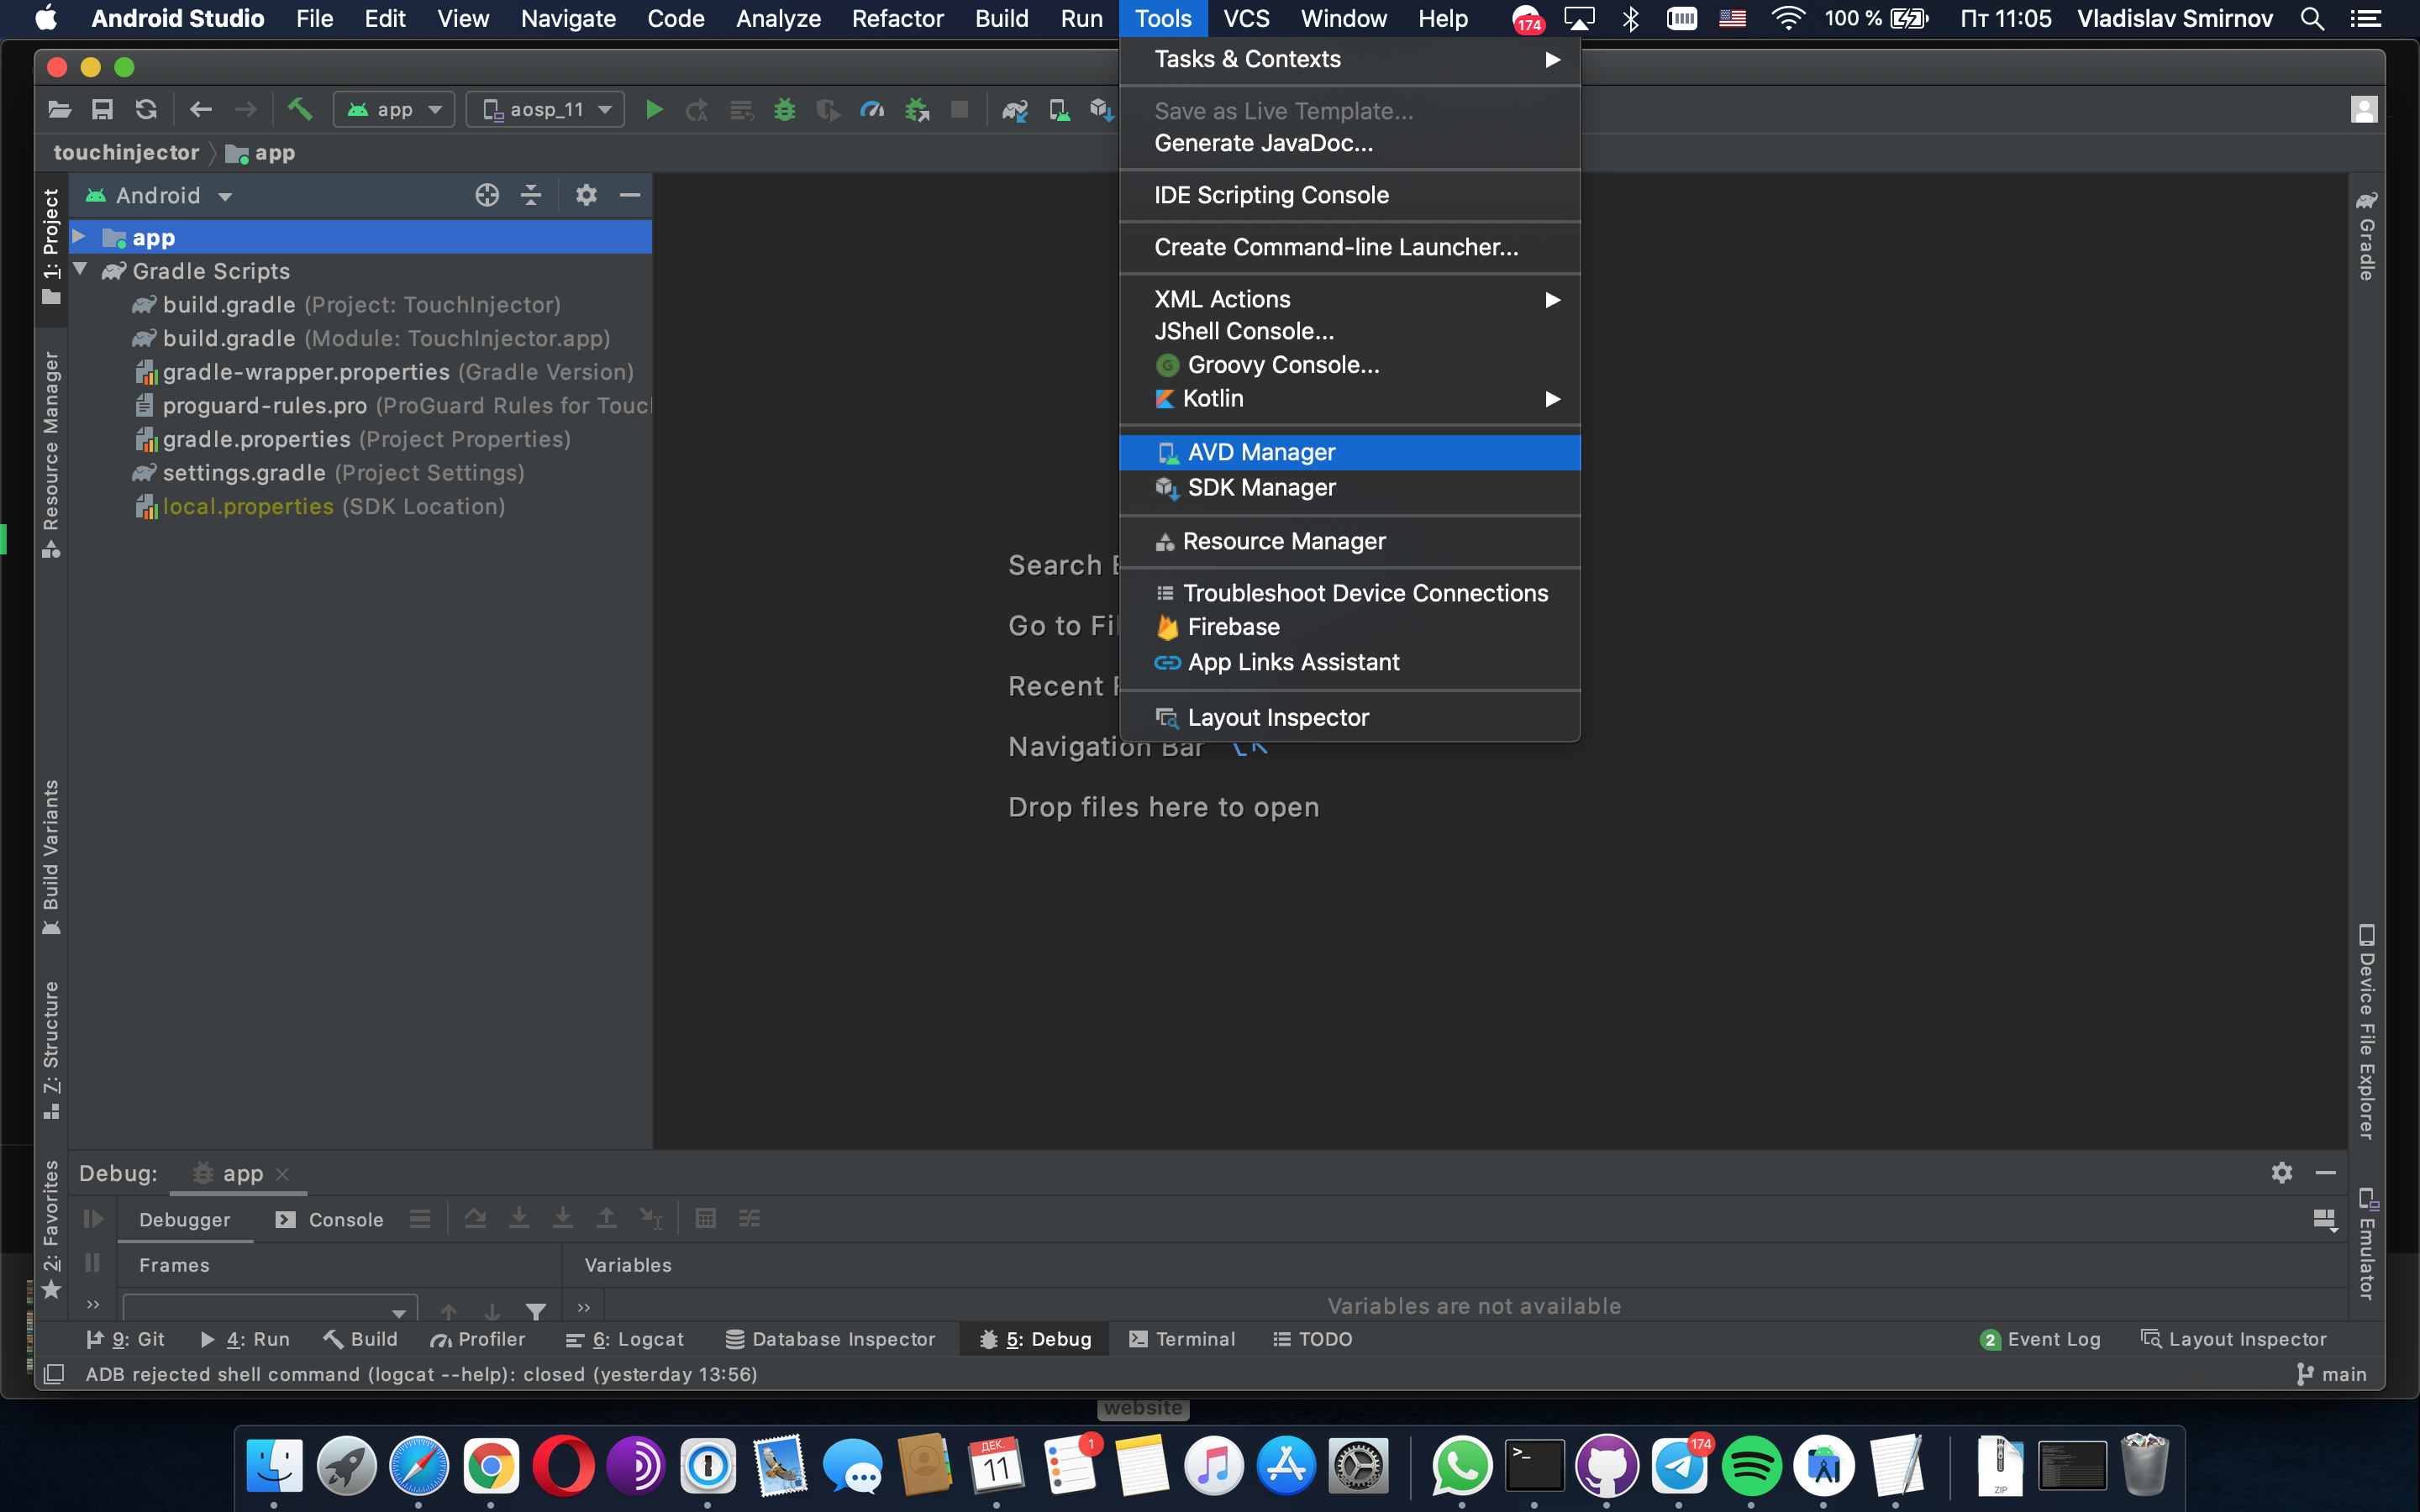
- Open AVD manager
Menu Tools -> AVD Manager
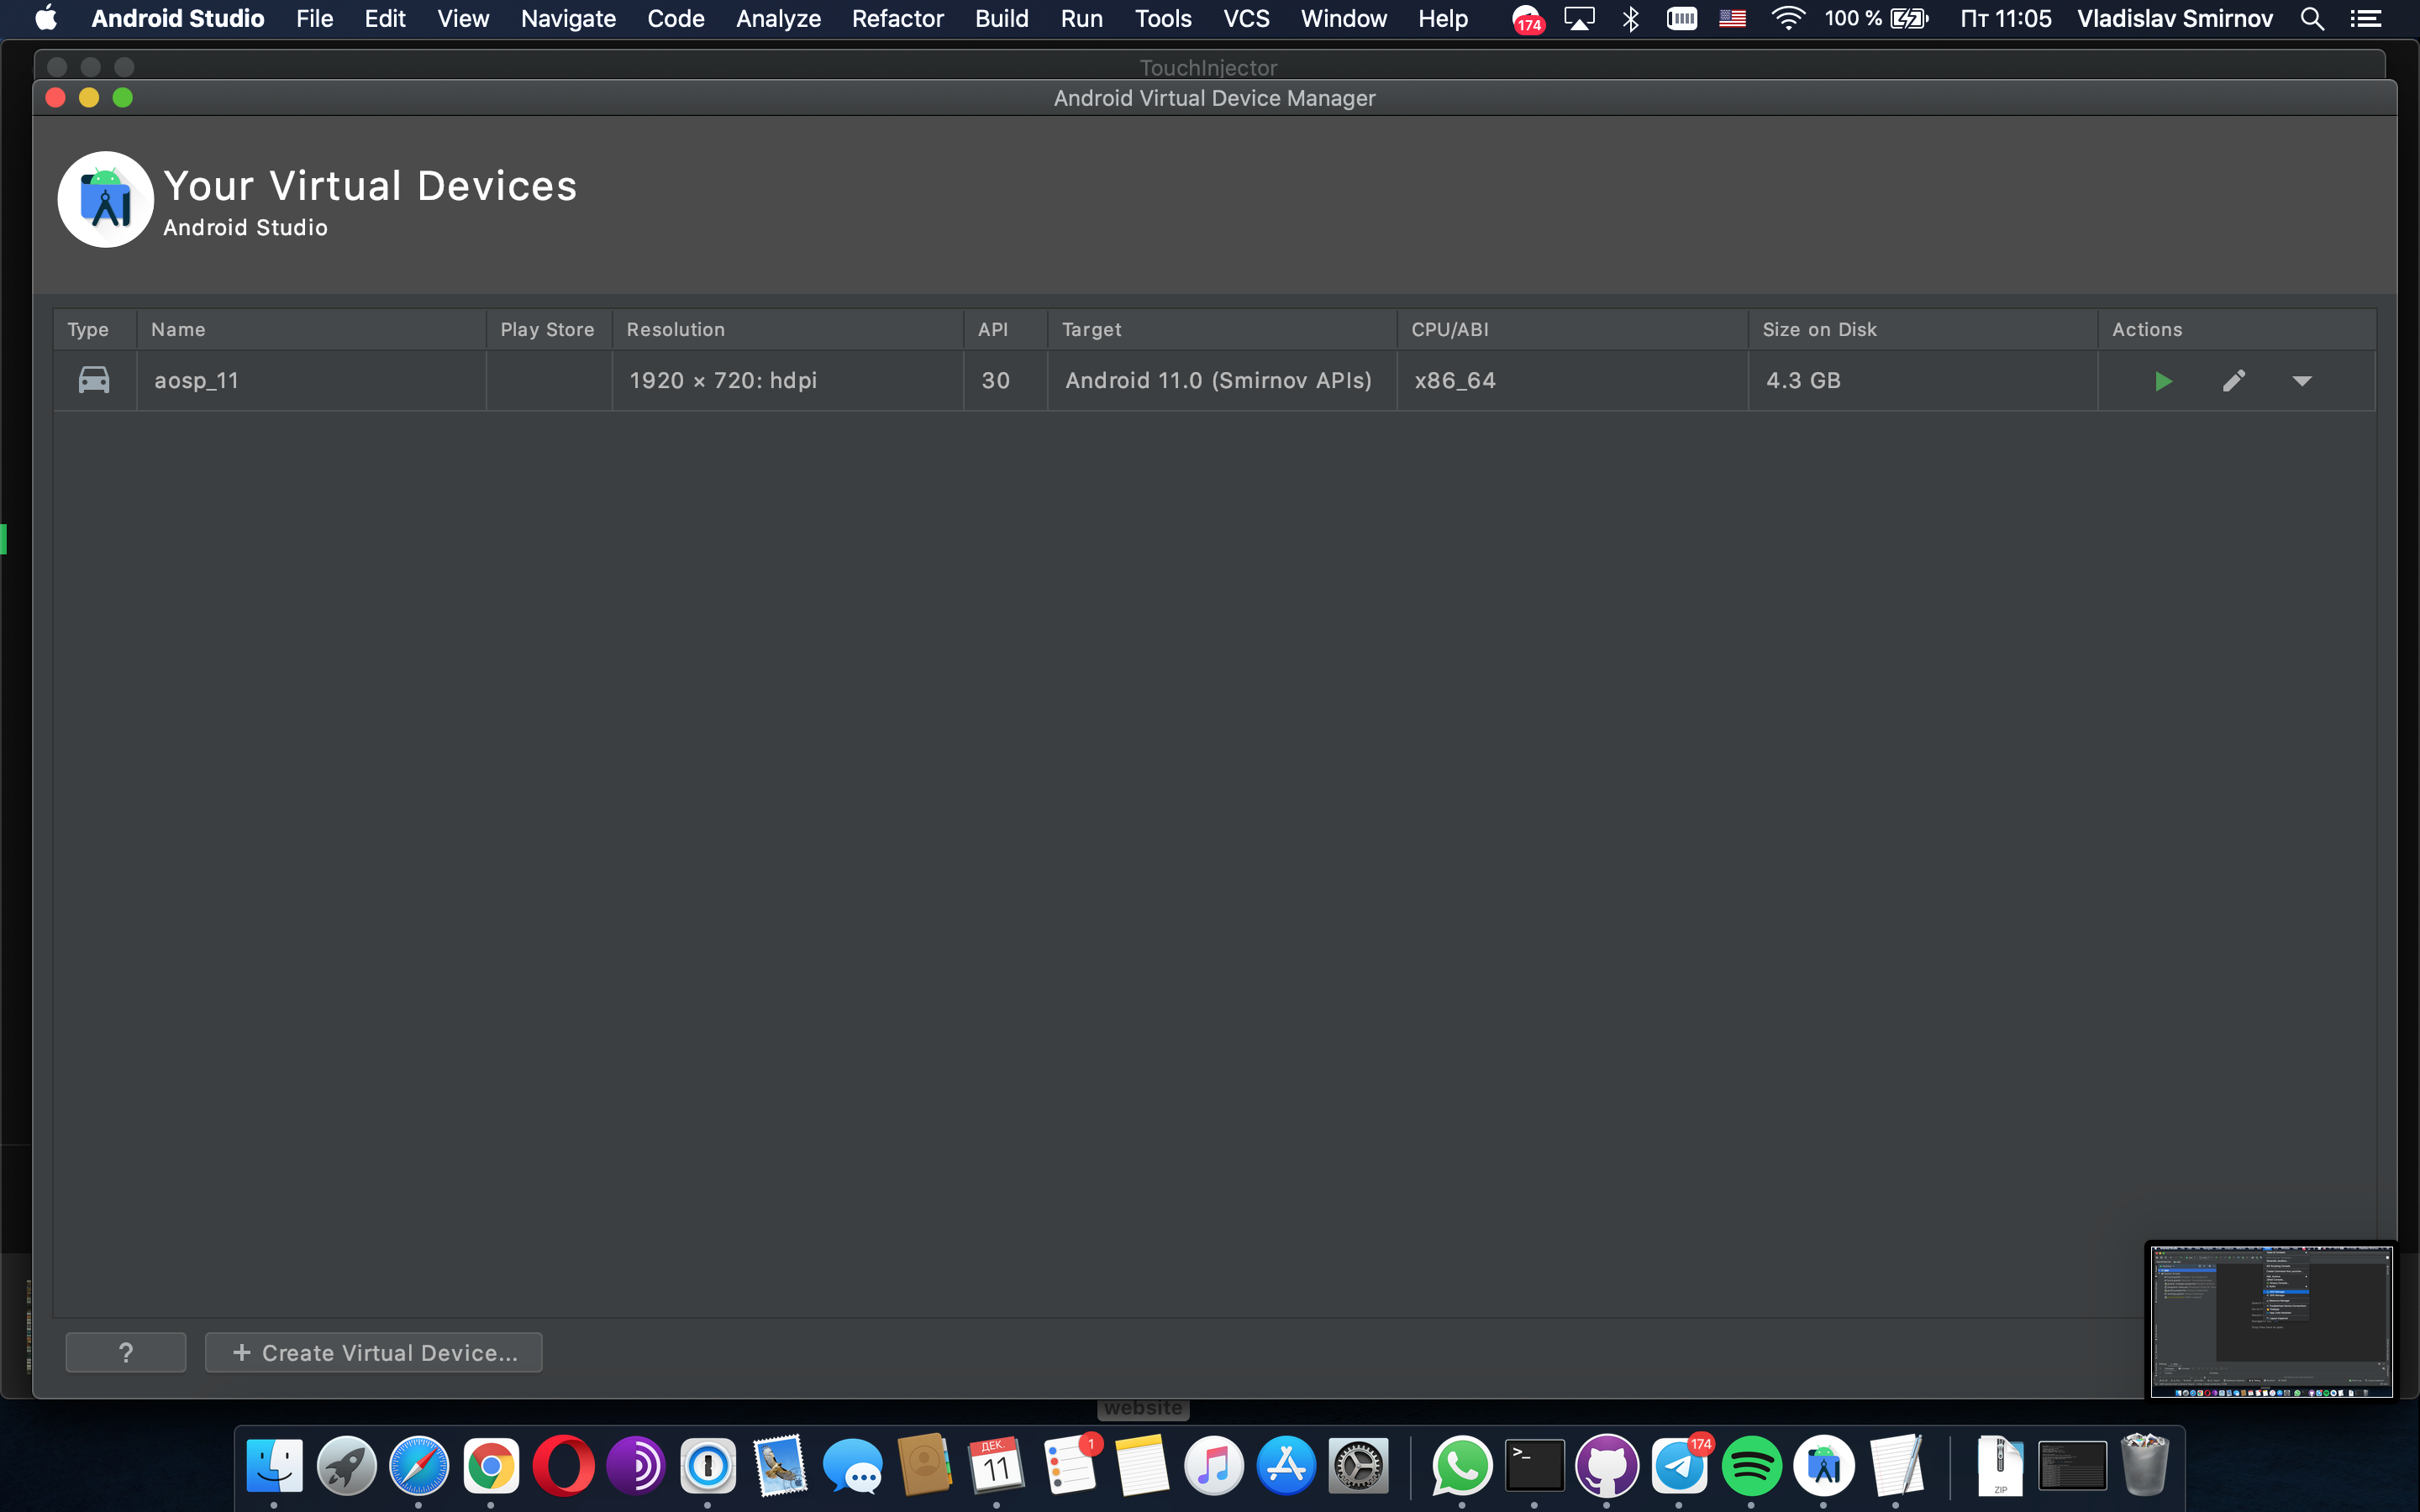
- Open Virtual device configuration.
Press button “Create Virtual Device”
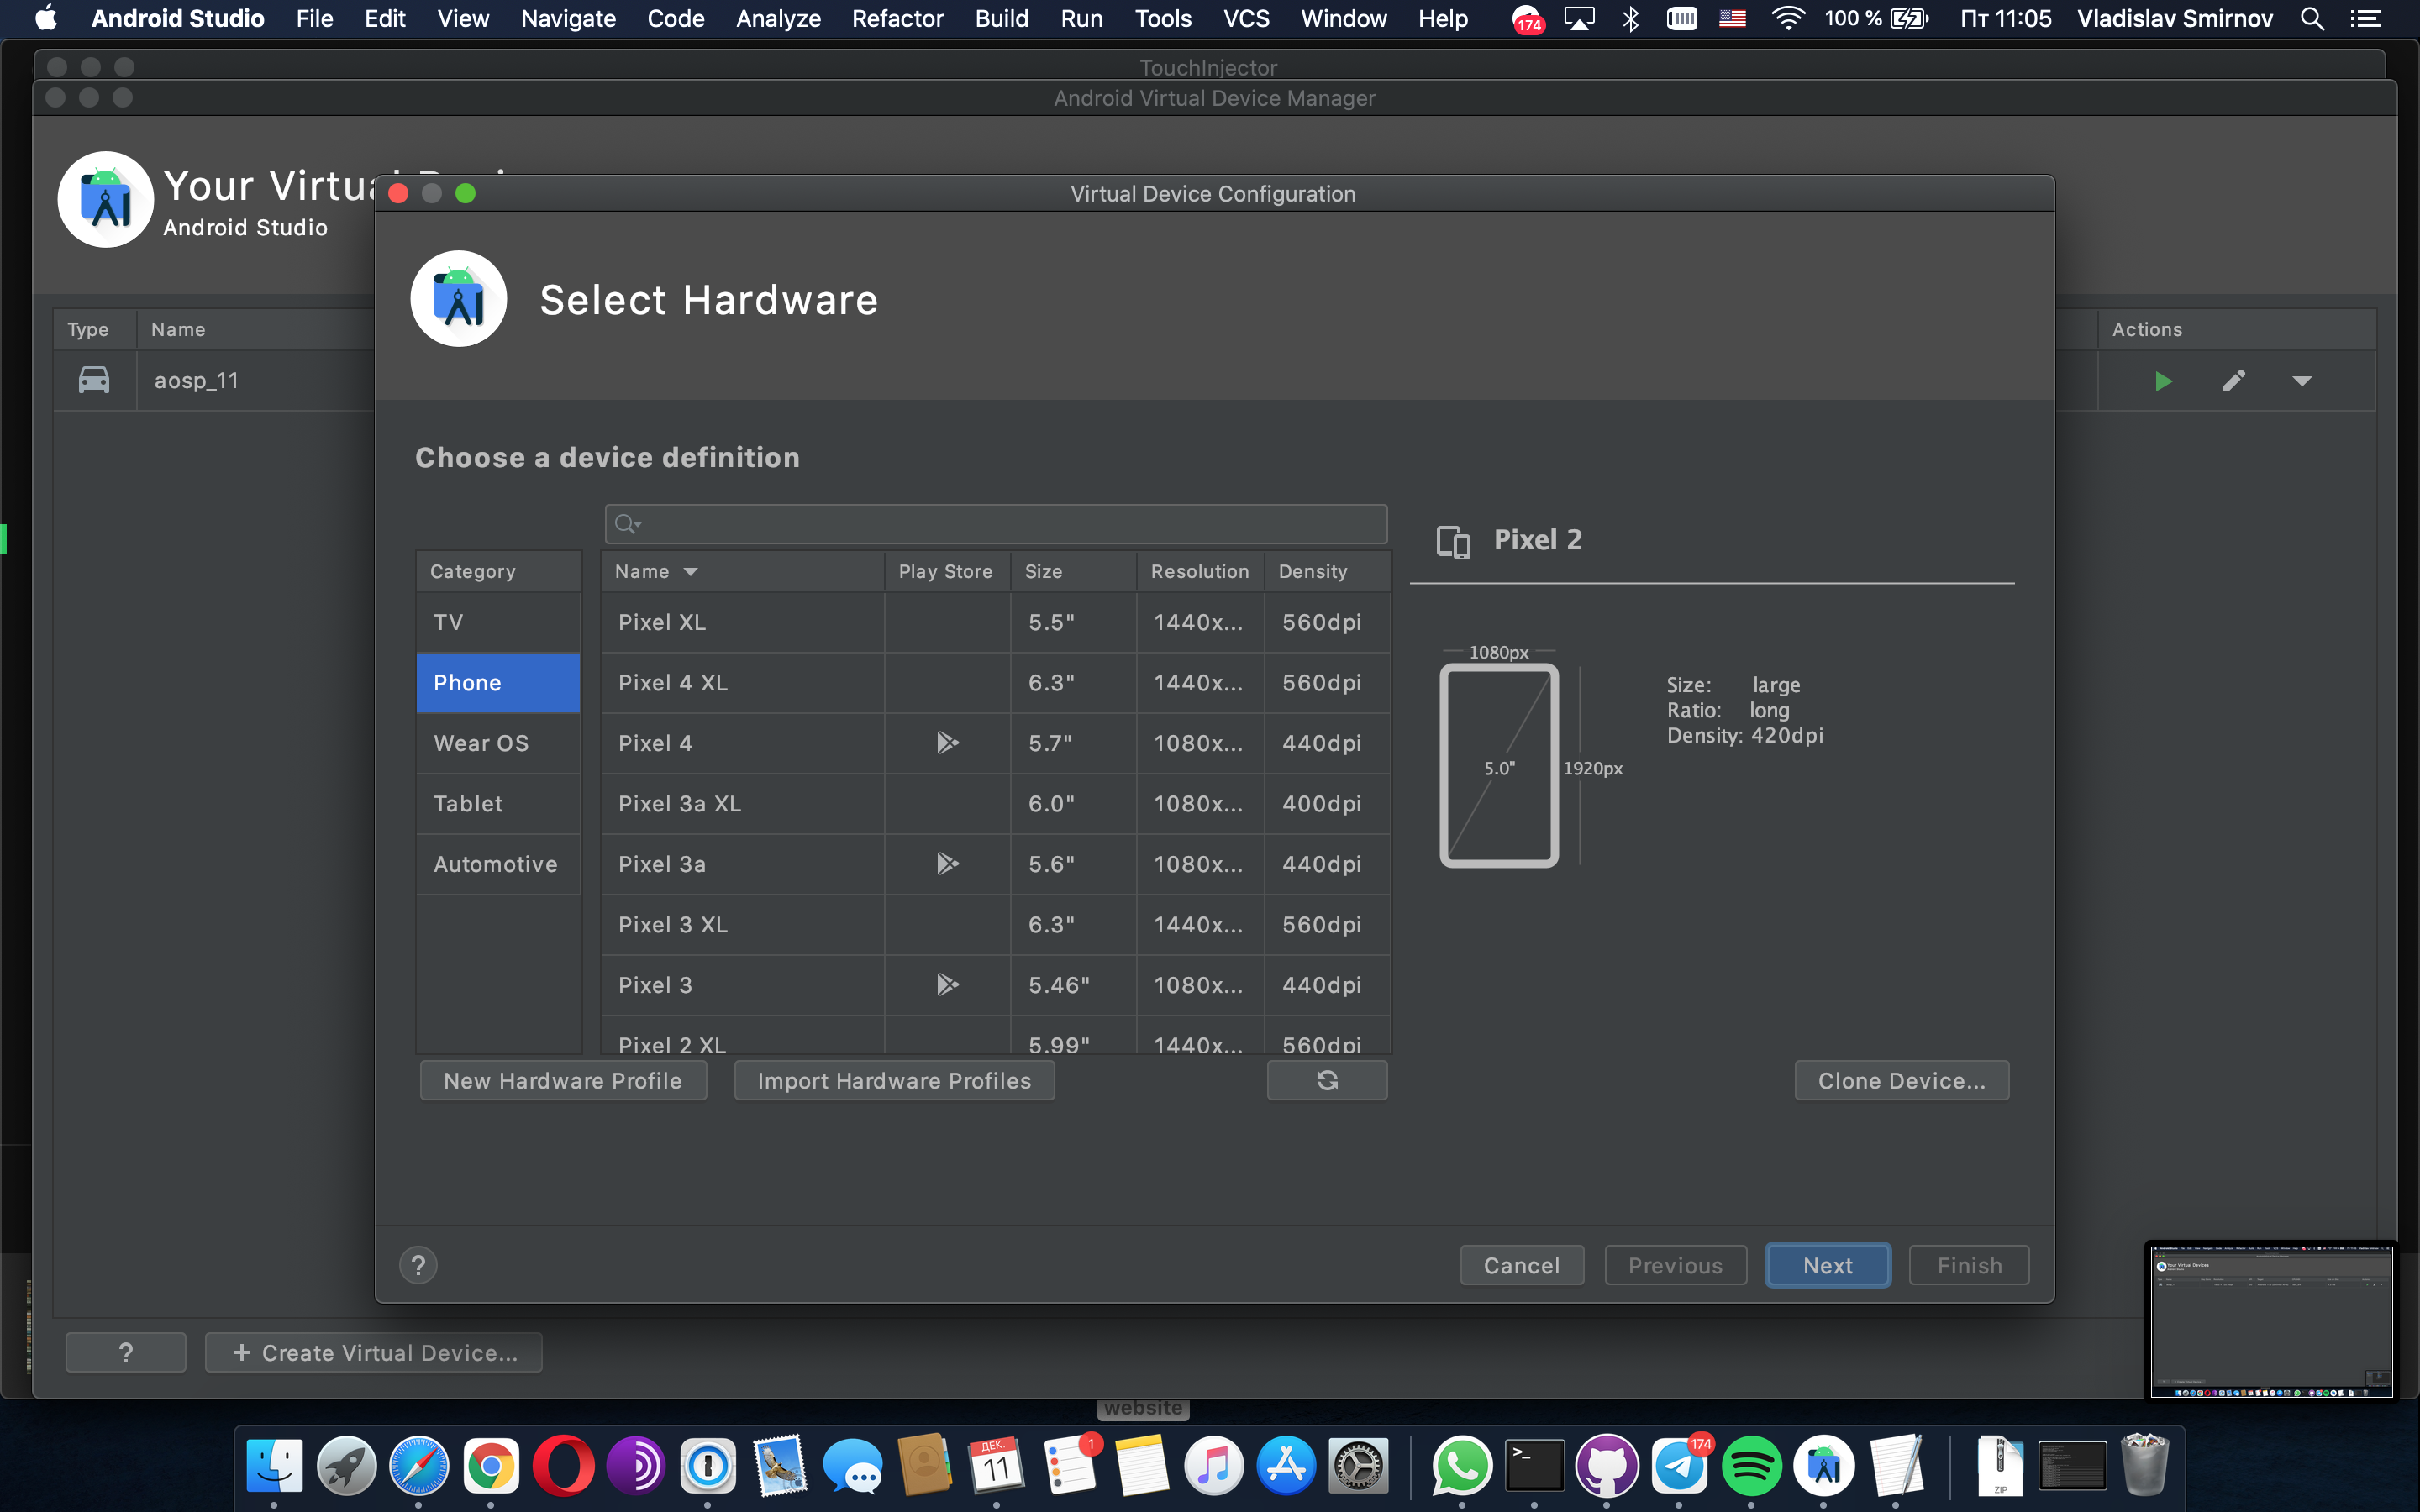
- Create New Hardware Profile
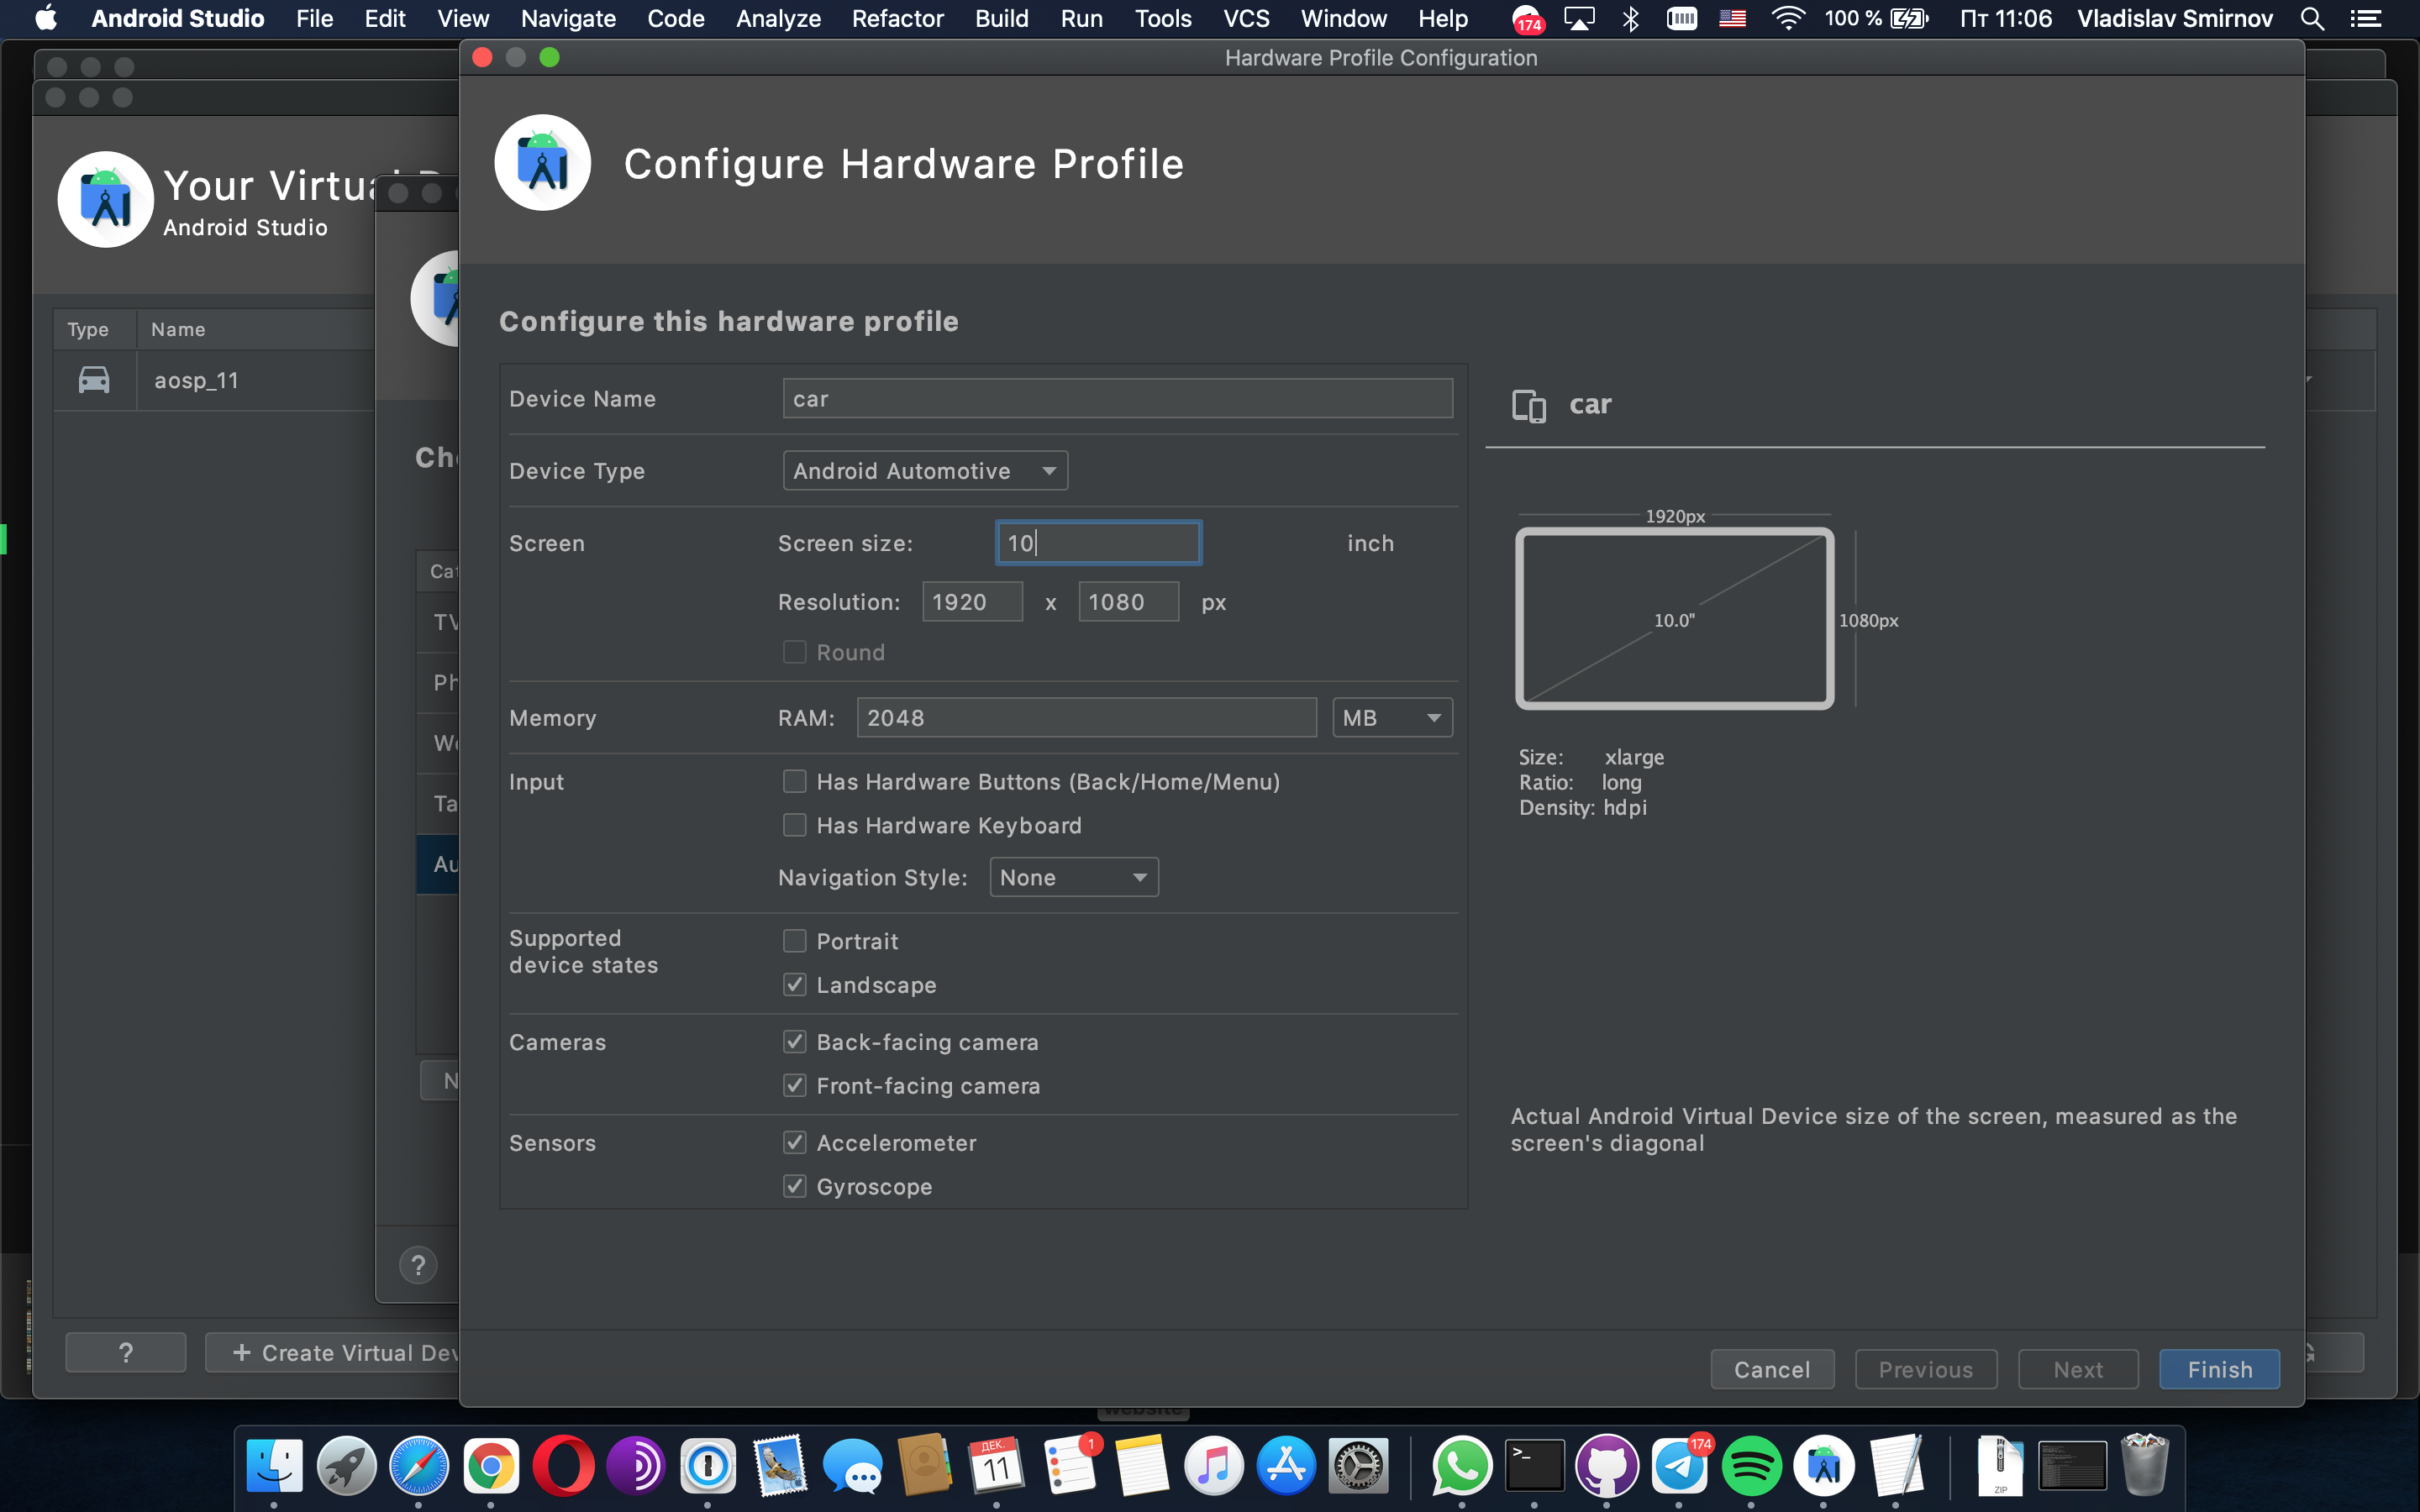
- Put device name as you wish. example “car”
- Choose device type: “Android Automotive”
- Set screen size. It depends of your requrements. I recommend to set 10.
- Set resolution. I recommend 1920x1080.
- Set Supported device states. I recommend choose only “Landscape”.
- Create AVD
- Select HW.
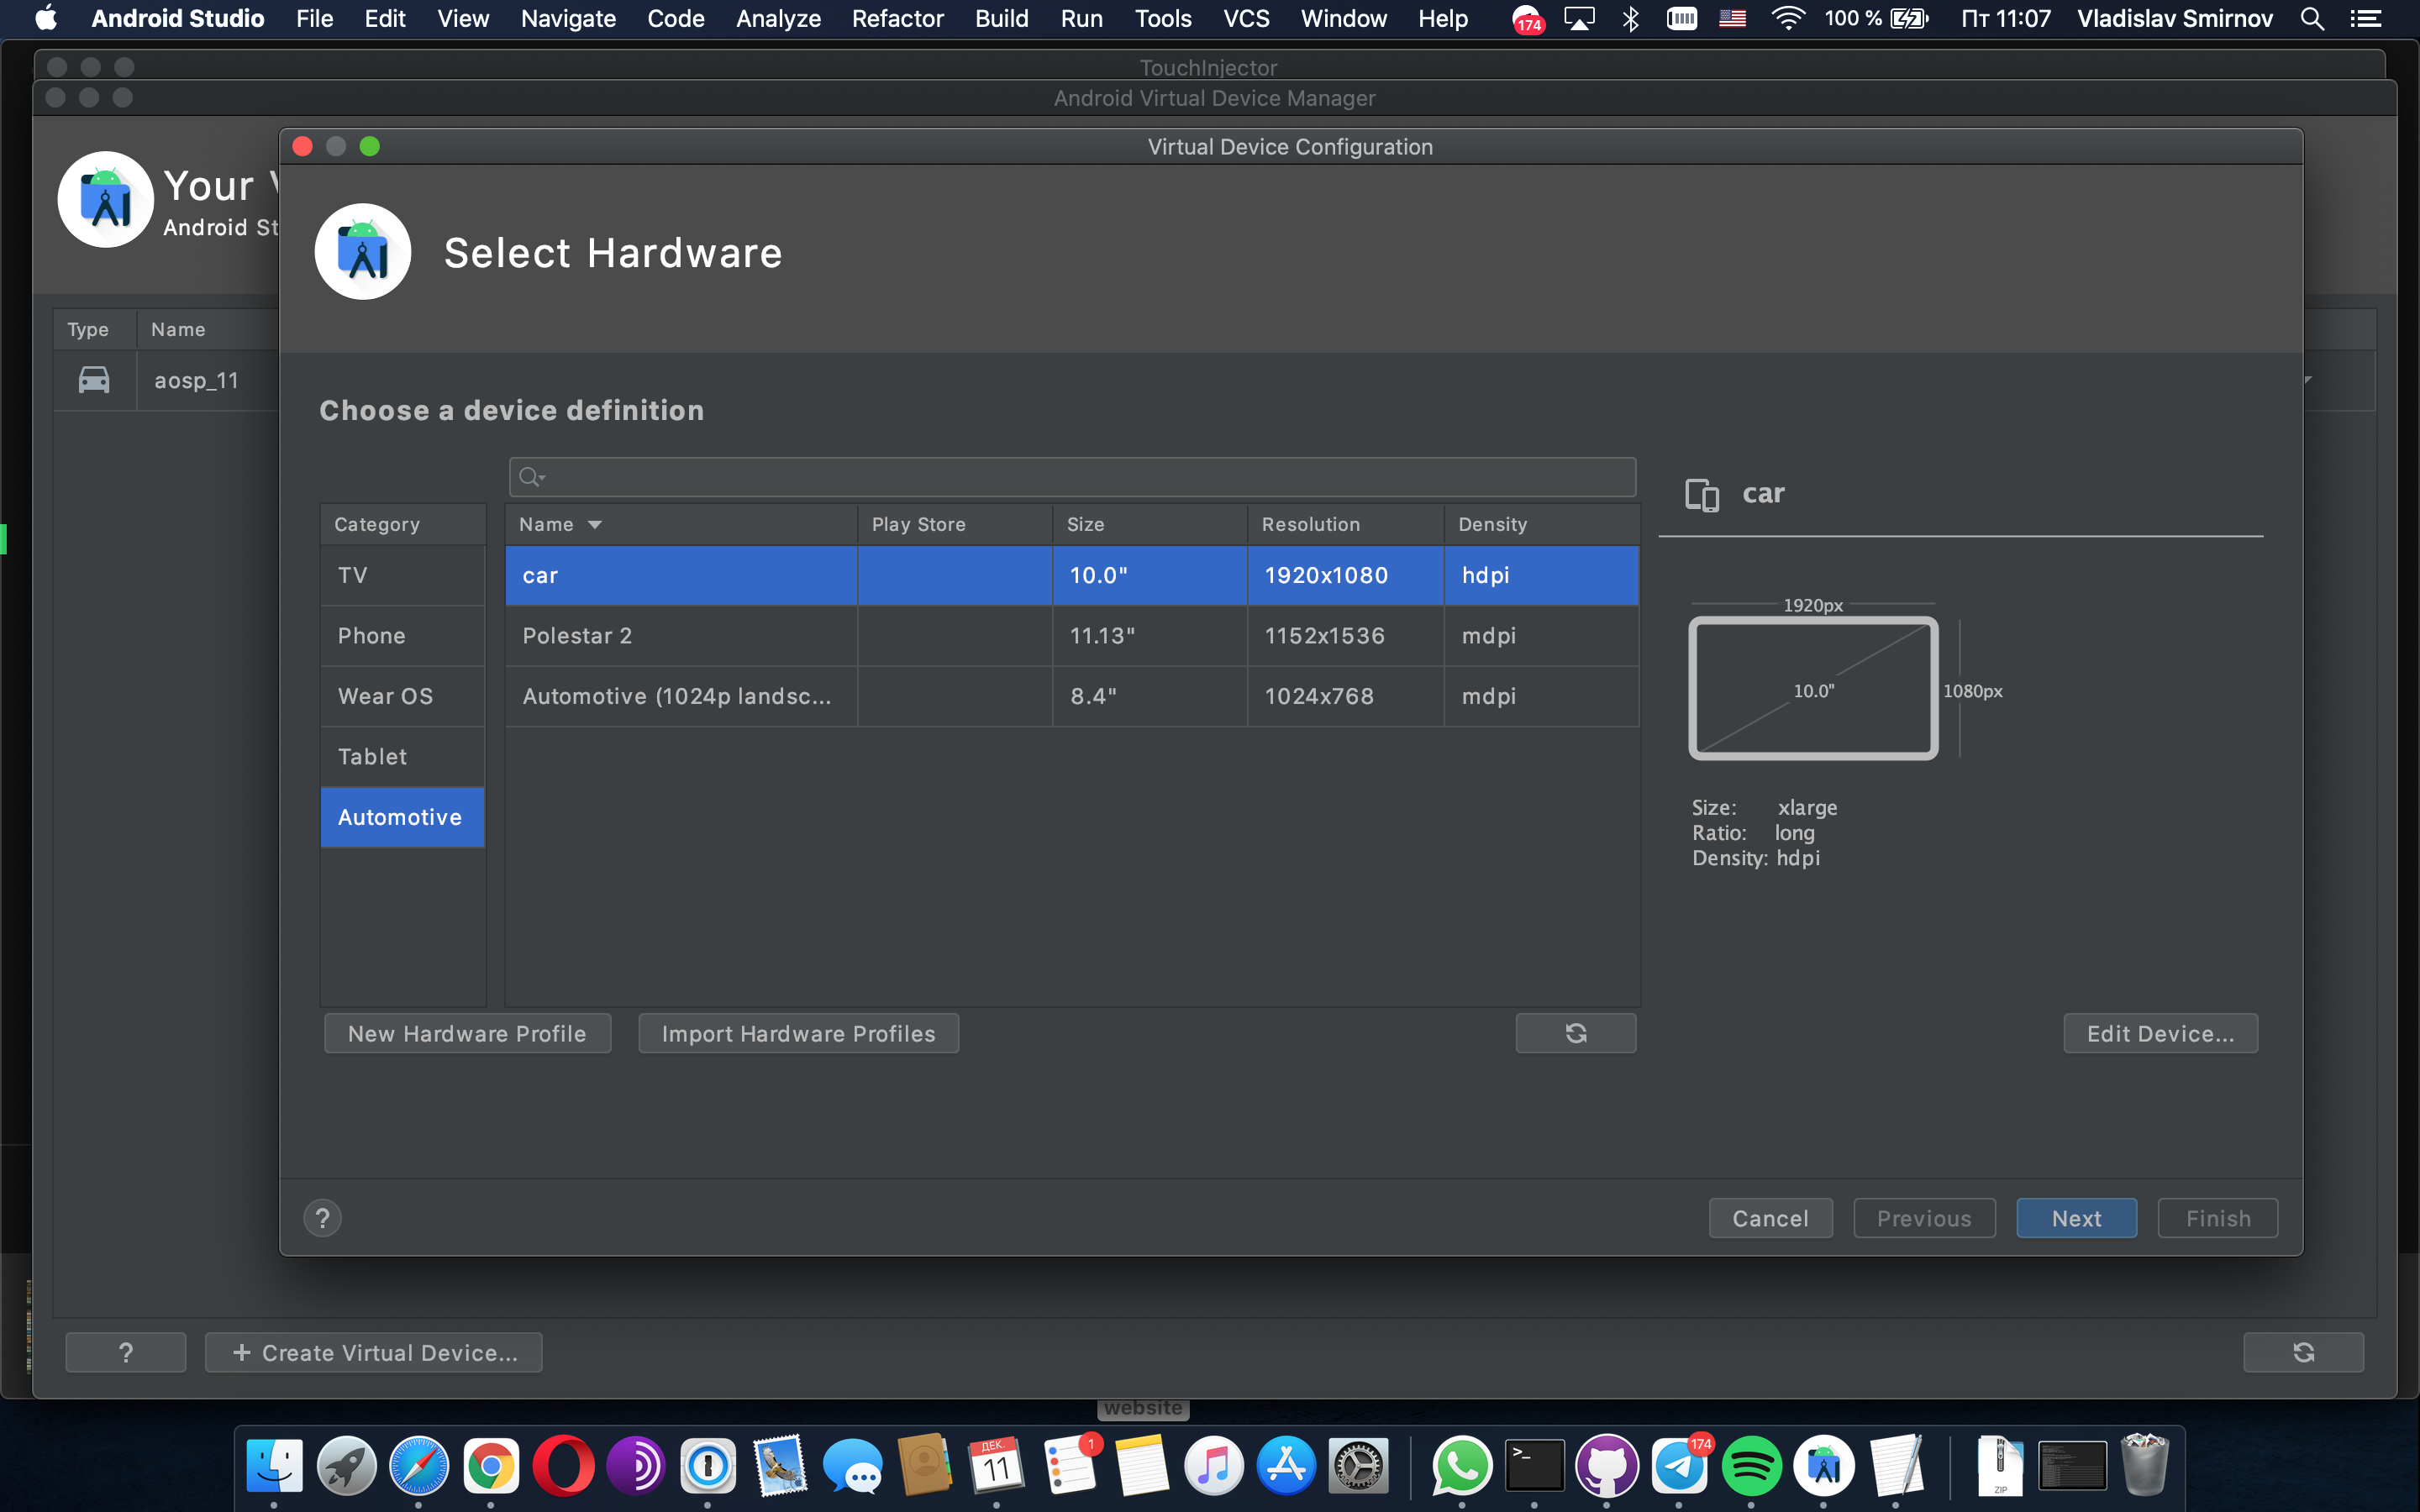
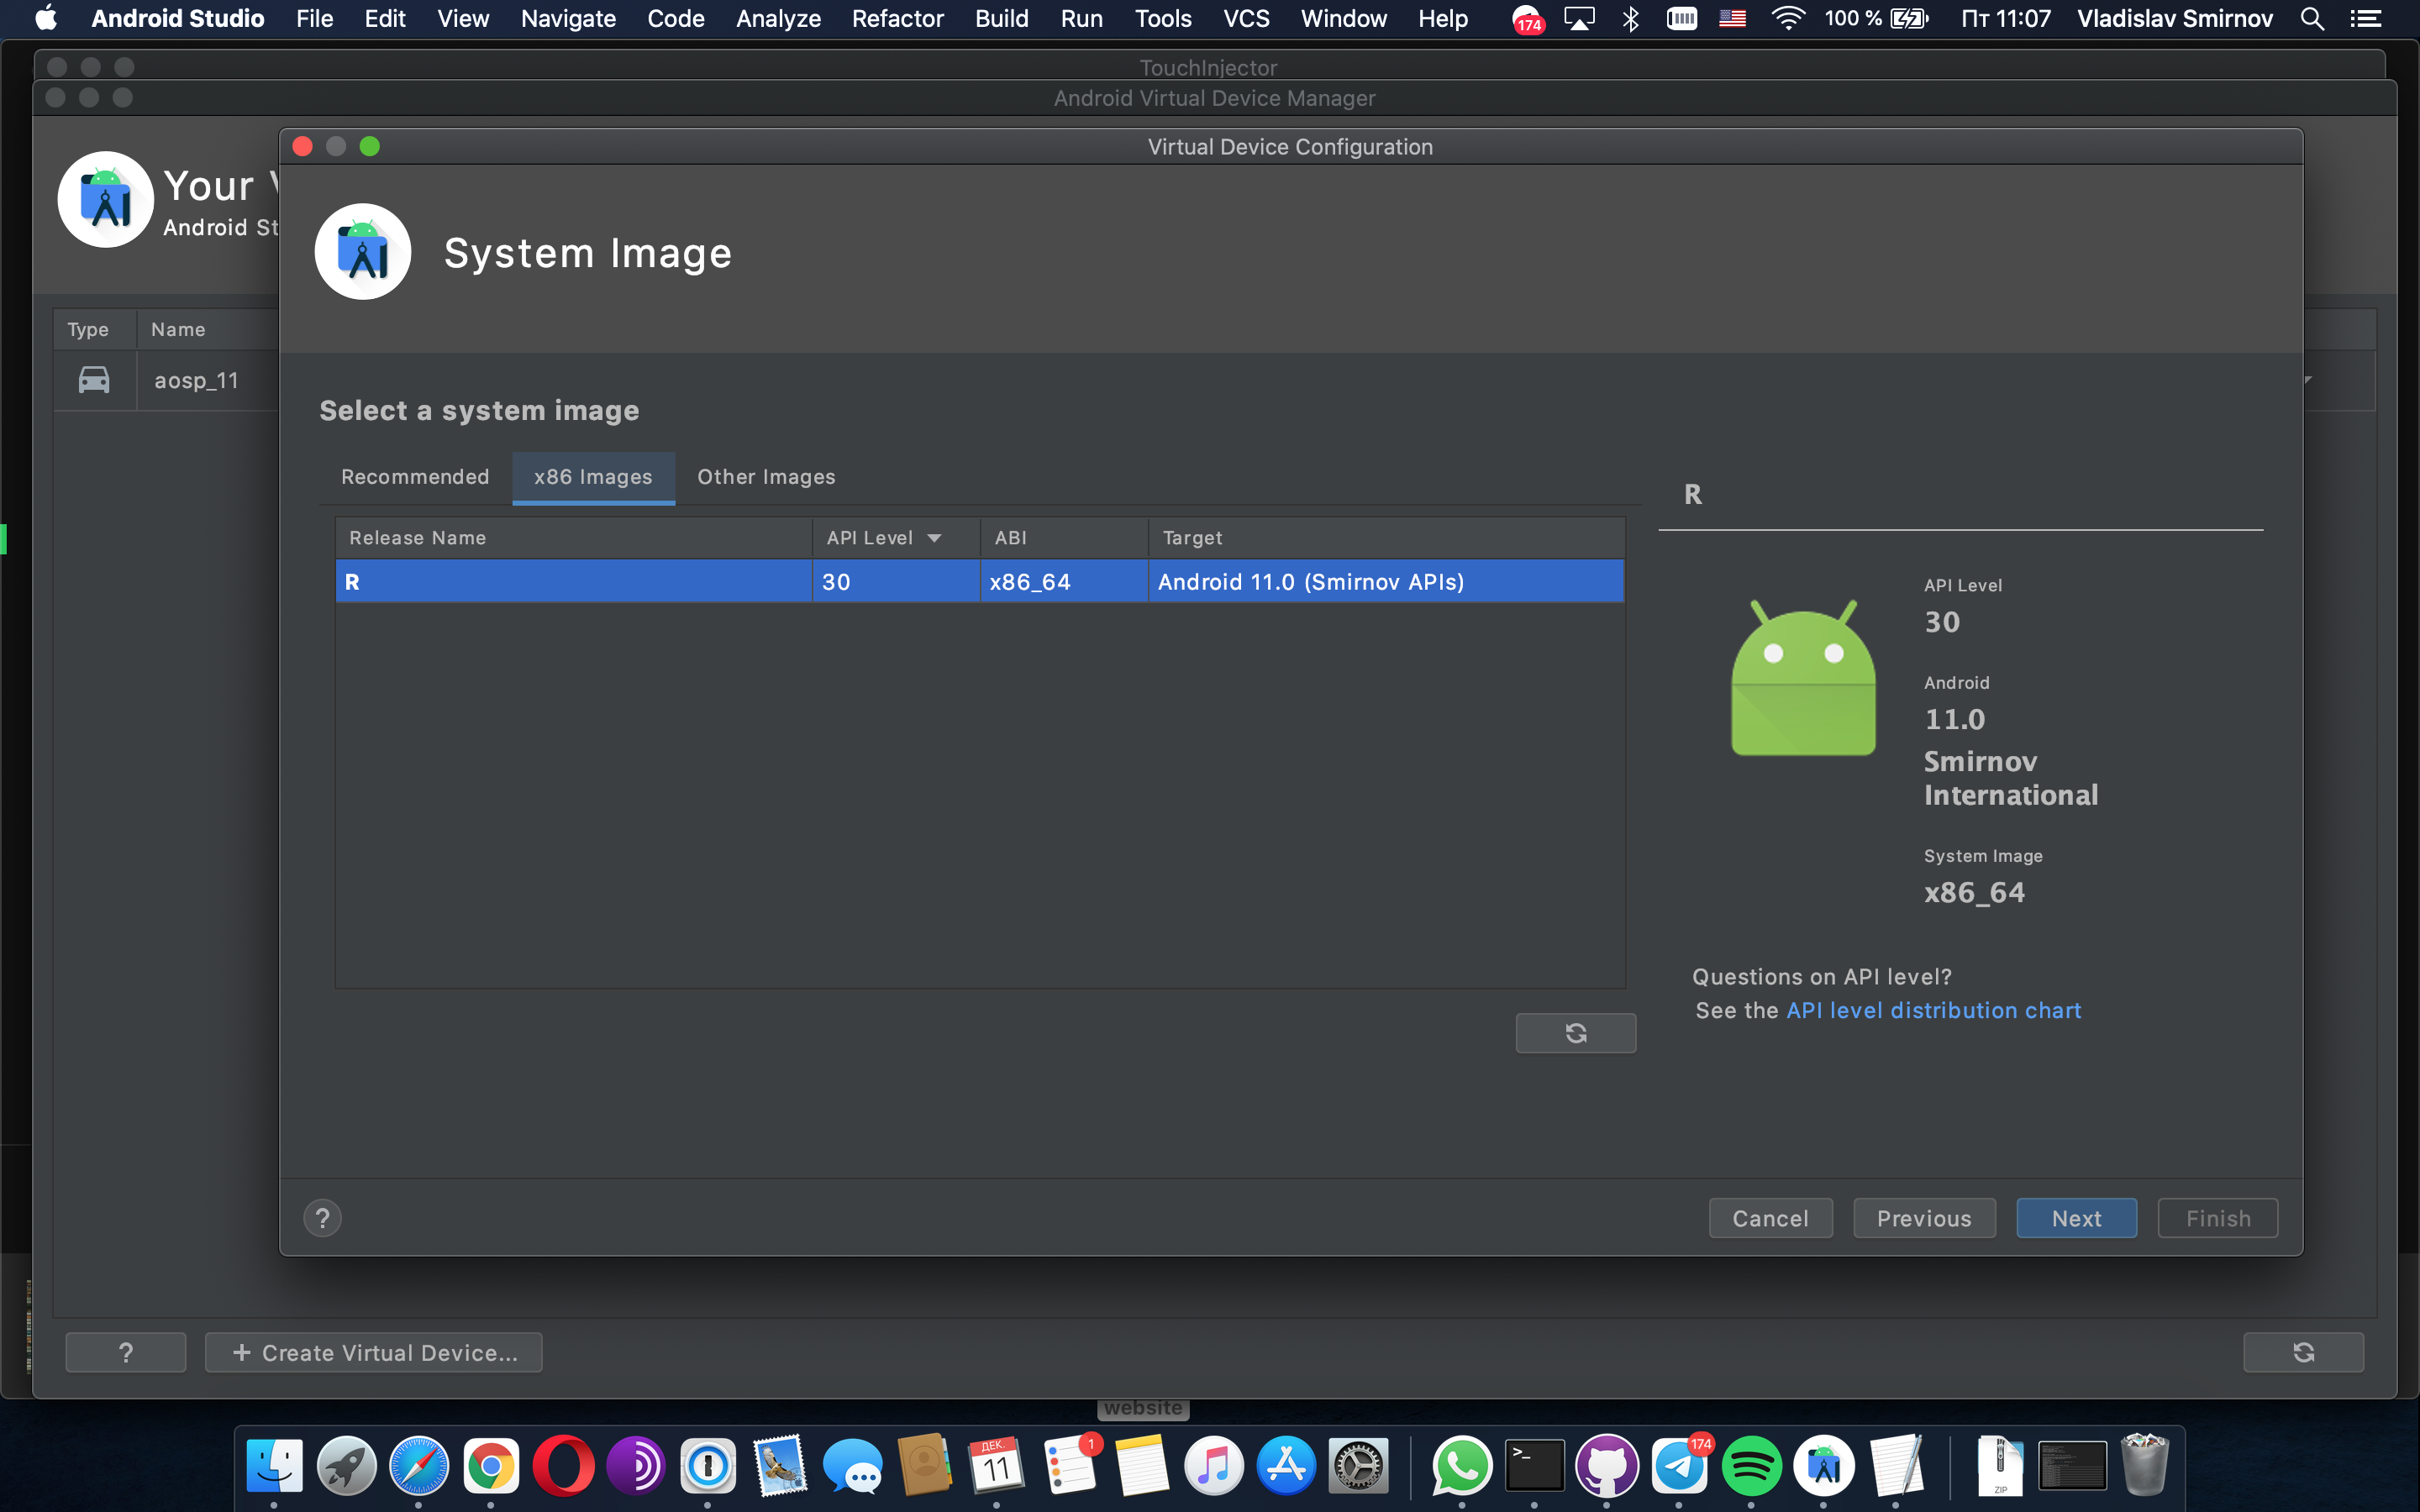
- Select System image
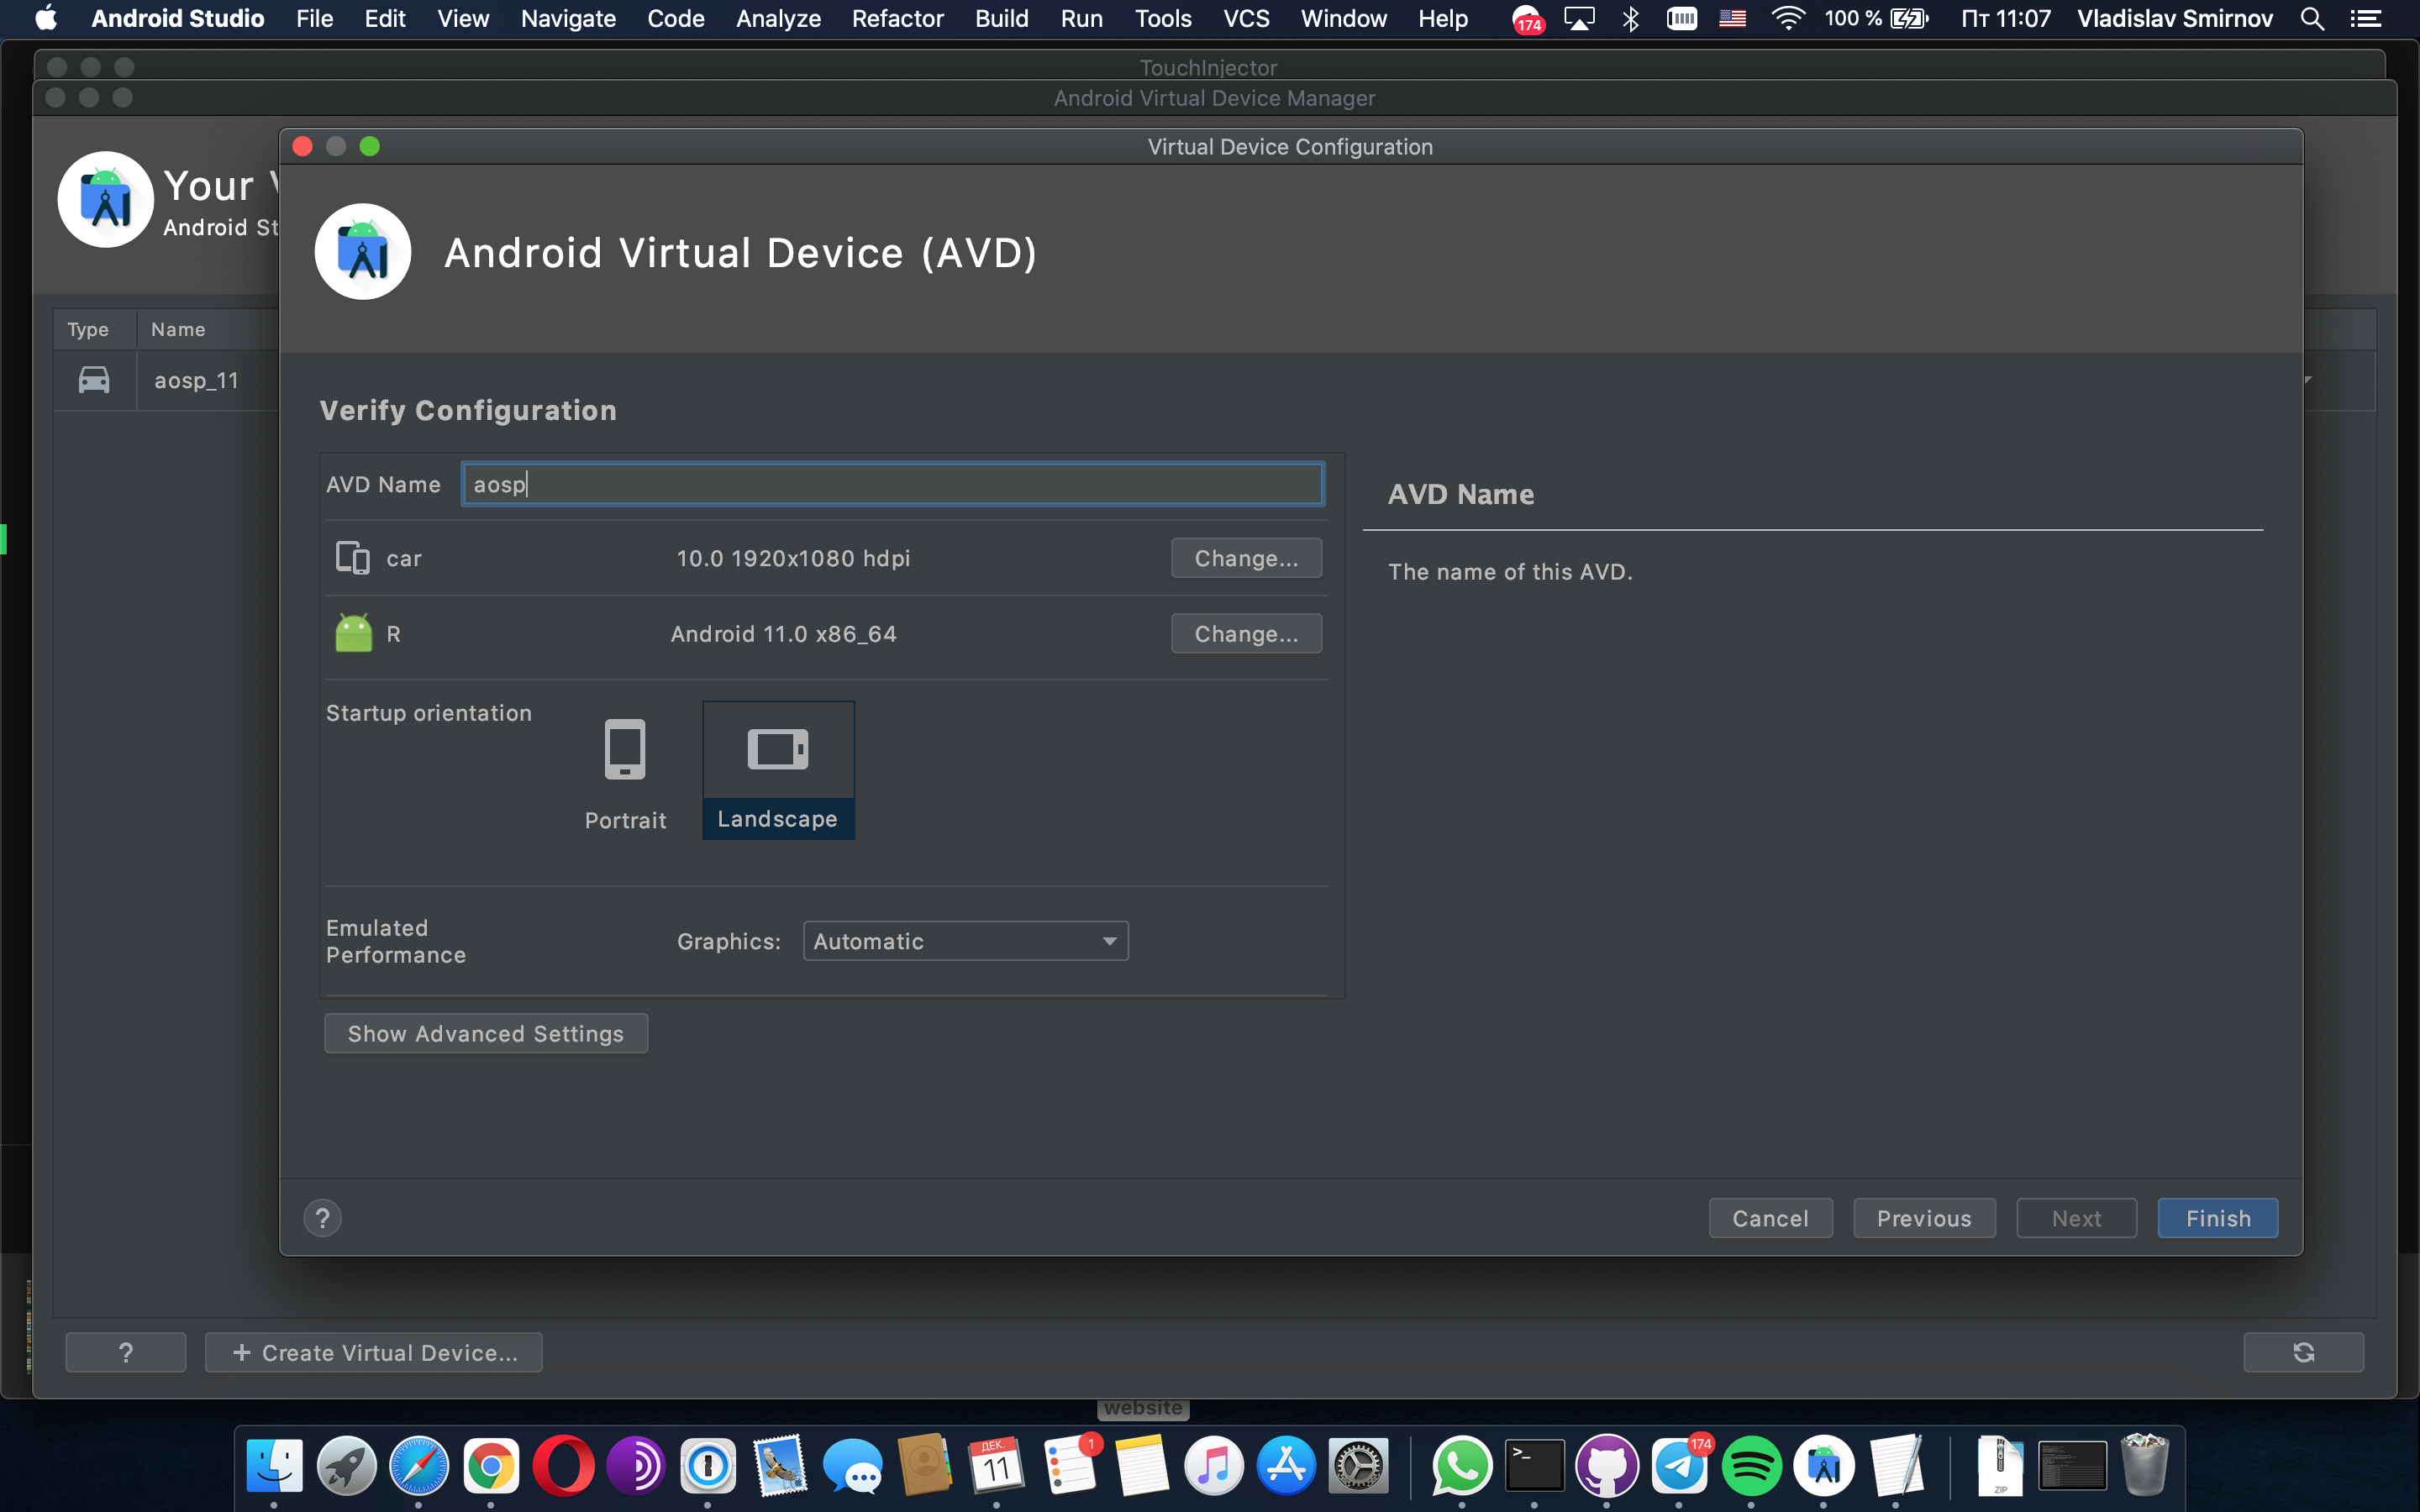
- Finish avd creation. Don’t forget to change avd name.
- Select HW.
Start AVD
To start AVD you can use Android studio or terminal(console). I use terminal.
- go to “Android SDK path”/emulator

- start emulator by command ./emulator -avd
-skin 1920x1080 -gpu on -verbose -debug-init -writable-system -selinux permissive -no-snapshot 
Only few parameters are important:
- -writable-system
- -avd
Wait when emulator will be opened.
Result:

For more details see developes android.
Root and remount
If you want to change anything on system partition you need to remount it.
use this commands:
- adb root
- adb shell avbctl disable-verification
- adb reboot
- adb root
- adb remount